This is my first shirt made from scratch! If you count cutting it out of a size 4x turtle neck as scratch. I think that's pretty close! I bought this shirt for $1 a year ago, I was planning to use the material to make knit baby pants. I bought a couple of these sweaters and made a few pants for baby showers. I found this left over piece the other day, and decided to make myself a new top.
I used a shirt I already had to make a pattern. I bought this black Gap shirt for probably $3 on clearance. I loved the way it fit, till I accidentally put it in the dryer. Now it's too short, which is a problem I have a lot. I'm tall and I don't want my leftovers stomach showing. Plus nobody likes having a crack attack, so long shirts are the way to go!
First I used tissue paper to write on and traced around the sleeve.
If you look hard you can see the word FOLD on my pattern, don't forget to cut on the fold!
I could have used more tissue paper to cut the body of the shirt out, but I decided to just lay she shirt directly on the turtle neck. I remembered to leave several inches at the bottom since I wanted a longer shirt. I did not cut off the hem of the shirt, this way it's already hemmed!
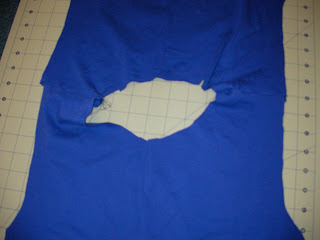
I cut the body of the shirt out, remembering to fold the sleeve in and cut around what would be the armpit area.
So here is what it should look like.
I folded the top piece of material over to cut the neckline out.
I used my black tee as a pattern for the scoop of the neck.
Then I pinned the shoulders together; remember to place the material pattern side inwards. There is no pattern on this fabric but I am using the shirts original hem so I don't have to hem it. So I made sure that was facing the right direction. Then I zig zag stitched the shoulders.
I then cut my two sleeves out using the left over long sleeves of the turtle neck.
This is what it should look like now.
Then I pinned the sleeves on. Remember to pin on the wrong side of the material. See how you can see the stitching from the shoulder seam. I folded my sleeve in half and lined it up with the shoulder seam and pinned it. Then I worked my way down each side. Now sew it together.
Flip it over and you made a sleeve!
After you admire your work flip it back inside out. Pin down the sides and the underarm area. (I know you're enjoying my fancy pattern talk, hah!)
Sew down both sides, and you're done! You just made a shirt!
I decided to shorten my sleeves a little bit. I decided not to hem the sleeves or neckline. The great thing about knit is it does not fray! I already used the existing hem, so I did not have to worry about that.
I wanted to add some embellishment to the tee. So I cut out five circles from the left over material. I used one circle as the base, and folded the others in fourths and pinned them down. I did this three times, obviously. You can make as many or as few flowers as you would like.
I sewed across each petal to the one across from it. I made sure I back stitched at the beginning and end, so they don't fall off my shirt in the wash. When you wash your shirt I would lay it flat to dry so your flowers are not all crazy.
After that I decided my shirt still needed a little something. I hand sewed three flat pearlized buttons to the middle of each flower.
I can't believe it turned out! I'm going to be making more tops for myself in the future for sure!
Not bad for $1, huh!
Excuse my squinty eyes and wrinkled forehead, the sun was in my face. Do you like my pageant pose? Yeah I'm not a very creative model.


