I decided to upgrade my mixer cover. I made one over a year ago with some extra fabric I had. It's a little kiddy and does not go with my decor. I bought this chevron fabric at Hobby Lobby and made my girls skirts out of it. I had just enough left over to make a new mixer cover. I am so excited they have chevron fabric at Hobby Lobby now (I'm obsessed)! This material is cotton, they also had black and white. The first cover I made was from duck cloth, which is probably a better choice. They also had some different colors of chevron in duck cloth there. This is an easy beginner sewing project.
So here is what I did:
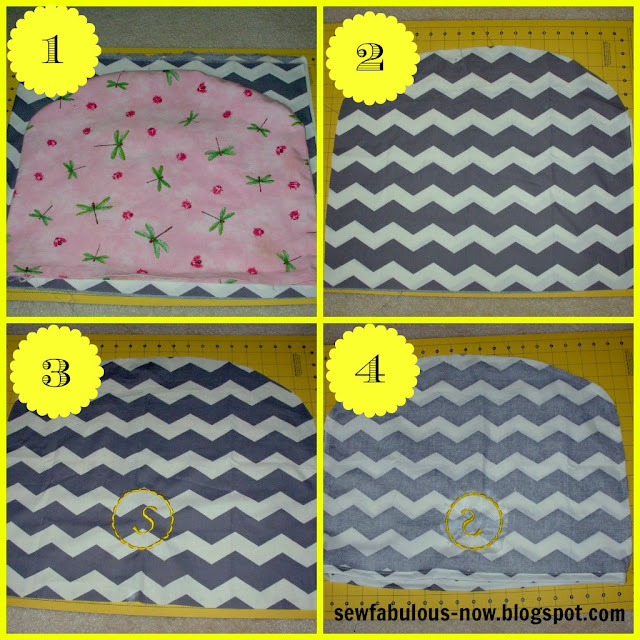
Step 1 and 2: I just placed my old cover over the material and cut around it. It measured 21inches long 16 1/2 inches high. I curved the top edges. You can make a template out of tissue paper if you would like.
Step 3: (This part is optional) I took one piece of the fabric and monogrammed our initial on it.
Step 4: Place both pieces of fabric together with right sides facing each other. Sew around the curve of the fabric from the bottom of the left side around the curve of the fabric to the bottom of the right side. Then fold the bottom of the cover over twice and sew all the way around it.
Now you are done! Enjoy your custom mixer cover! It's great for keeping dust out of your mixer, and making it match the rest of your kitchen. (My mixer is red, and nothing else in my house is red)
This would also make a great gift!
Check out my linky friends here:
Sumo's Sweet Stuff, Skip To My Lou, I Should be Mopping the Floor, Sew Can Do,
Sew Much Ado, My Girlish Whims,
Southern Lovely, Someday Crafts, Sweet Little Gals,
Six Sisters Stuff,
Too Much Time
Check out my linky friends here:
Sumo's Sweet Stuff, Skip To My Lou, I Should be Mopping the Floor, Sew Can Do,
Sew Much Ado, My Girlish Whims,
Southern Lovely, Someday Crafts, Sweet Little Gals,
Six Sisters Stuff,
Too Much Time


