Monday, February 27, 2012

Cloth Napkins


My friend asked me to help her out and sew some cloth napkins together. She's wanting to be more green and use less paper products. Great idea huh! I will have to sew up a batch when we move, after I figure out what color our dinning room will be. This is a really easy sewing project, it's just time consuming if you want to sew a bunch. I found that an assembly line was the best way to finish this project. So here is what you need:

Fabric- I used 4.5 yard of my flower material and the same amount in black (she wanted 20 finished napkins) This fabric is from Hobby Lobby
Coordinating Thread
Scissors  
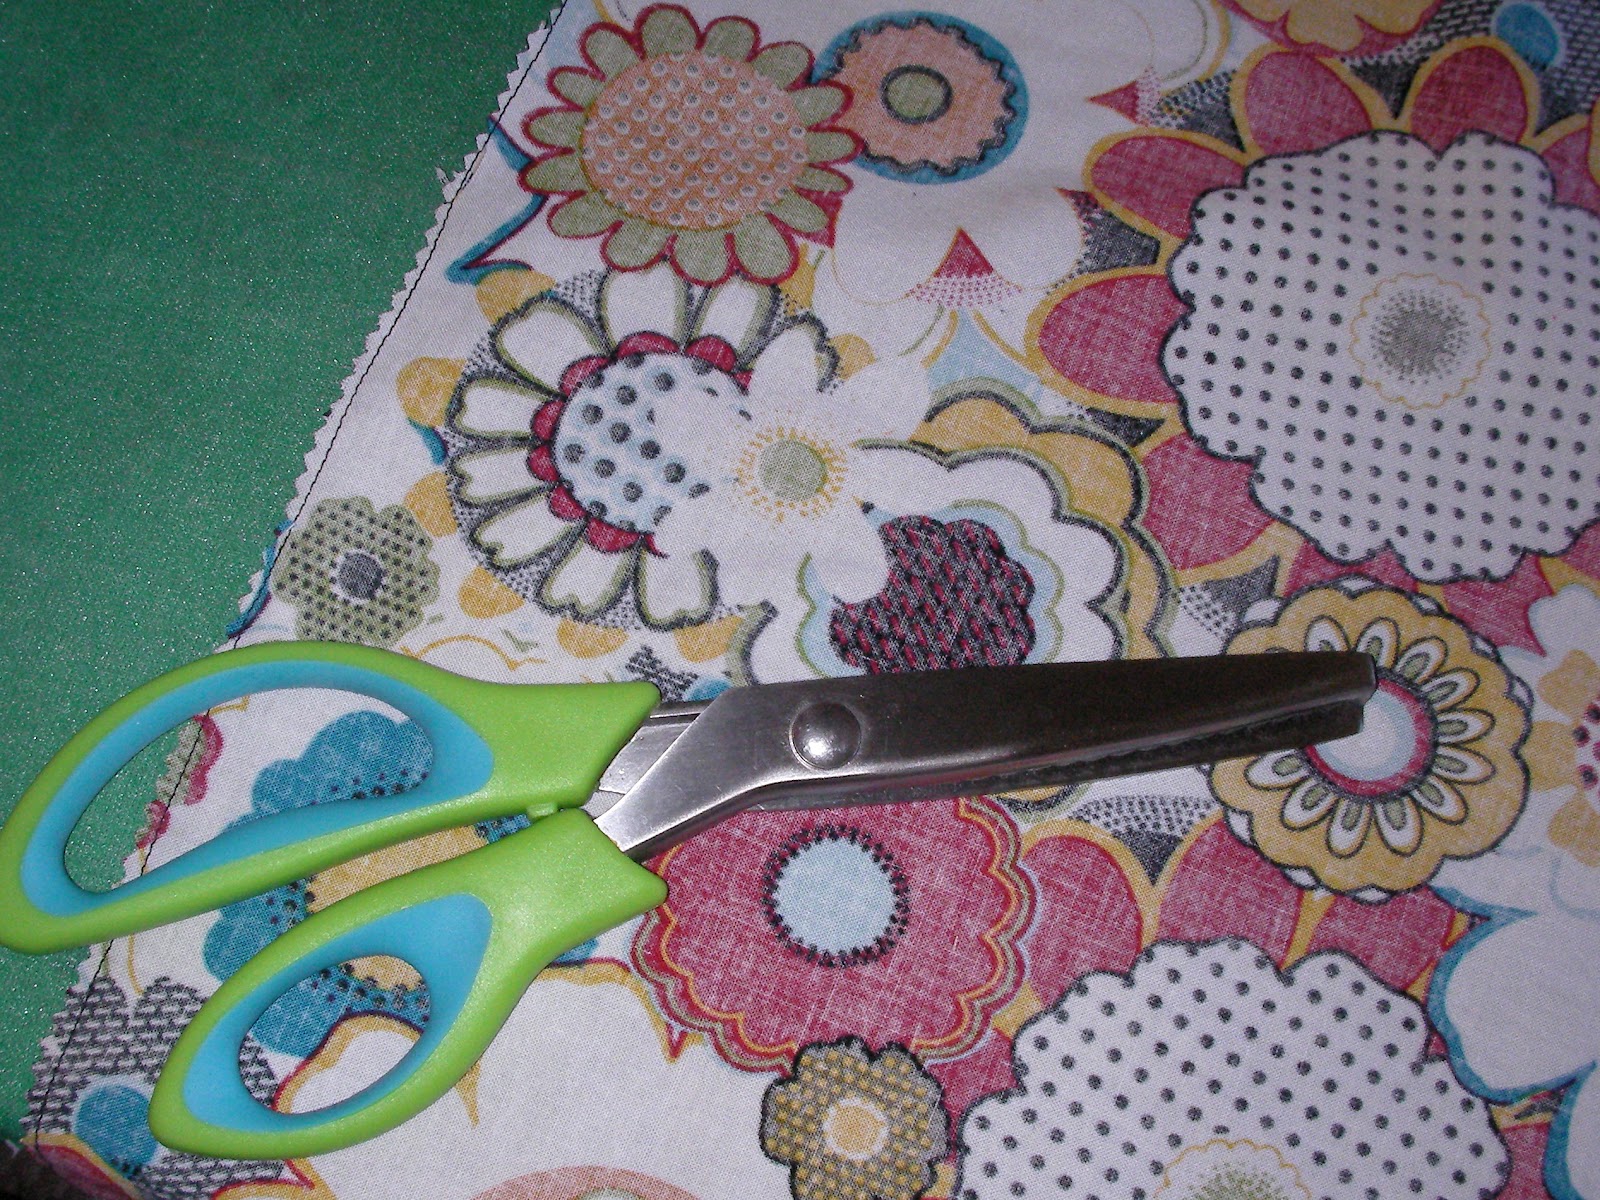
Pinking Shears- Scissors that make a zig zag cut
Iron

The first step is to cut out your fabric. My friend wanted 18 in x 18 in napkins. I cut 18.5 in x 18.5 in; leaving a little left over for seam allowance. After you have your stack of material match two pieces together with right sides facing each other and pin. Then sew around the square leaving an opening around 4 inch wide. 

 Then I cut around each square with my pinking shears. 
 I then turned the napkins right side out and ironed them. After I had all the napkins turned right side out and ironed, I top stitched around them all. 
 Now you have a beautiful dinner napkin, perfect for entertaining! These would also be a great wedding present or house warming gift with initials embroidered on them.


Wednesday, February 22, 2012

Girly Spring Cuff's

I made these cute spring cuffs for my girls. I am going to put them in their Easter baskets. They would also be great for birthday party favors. They are SUPER easy to make, and SUPER cheap! Here's what you need:

Soft Roll Elastic- I bought mine for $1.50 a yard here.
Felt Shapes- you can make your own or buy a bag of pre-cut ones. (my mom bought this bag for 49 cents. I think it was from the Christmas Tree Store or Wal-Mart)
Hot Glue
Embellishments- optional ( I didn't use any because my three year old sticks everything up her nose, nice huh!)


My girls wrist are 5 inches around. I made my elastic 6 inches long. Then all you have to do is hot glue the ends together. 

Then glue on your felt, and your done! 
 The one I'm modeling is a little bigger of course! When the girls get them in their Easter baskets I will take some pictures of them with them on. 

Tuesday, February 14, 2012

My Project Pile

 So this is what I've been up to lately. Here is my pile of things to sew as of yesterday morning. The pink and white material will be summer dresses for my girls. The blue flower material is pj shorts. I'm getting a head start on my summer projects since we will be moving in May. I'm not sure how busy I will be with a new house. I will probably be posting more home decorating projects then. The right side of the photo is my pile of burp clothes and passy straps. They are always good to have on hand for baby showers. I found the material on sale at Hobby Lobby, you can't beat $3 a yard!  
 Last night I finally started working on my pile. Here are some finished products. Cute shorts, burp clothes and passy straps. 
Here is a baby shower gift I made. I love it! If I had a little man he would be wearing this for sure! Sometimes the hardest part of a project is just getting started! I have found that the assembly line method works the best for me. A few days ago I cut all my patterns out, and the burp clothes and passy straps. Then I used my serger on my shorts and dresses a few days later. A few days after that I finished the shorts and made the burp clothes and passy straps. I did all my ironing at once too. It makes it a lot easier. Now all I have left is to finish the dresses and hem two pairs of pants for my husband. After that I will be sharing some more tutorials. Happy Sewing! 

Wednesday, February 8, 2012

Top to Cardi Refashion


For this project I used another shirt that I almost gave to Goodwill. I liked how soft the shirt was, but I didn't like the fit. It was a little too loose, and looked a little frumpy on me. I decided to make a cardigan out of it. 
 The first thing you need to do is fold your shirt in half, and cut straight down the center. 

 I used left over knit from another project to make the ruffles. I cut out long stripes about 1 inch wide, then I ruffled them. 

 This ruffle tip will make your life so much easier! Just change the stitch length to 5.0 and the tension up to the highest number your machine can go. Then you will have an automatic ruffle; you need to know this if you have a girl. This has made my life so much easier! I hate pulling thread to make a ruffle. 
 Then I pinned my ruffle to the front of the shirt. I then stitched it down the center, remember to backstitch at the beginning and end of the ruffle. (My ruffle fabric does not match the top perfectly, but I think it's fine.)

 I hand stitched a snap to the top of the cardigan. Then I added a button on top. 

 Now you have a new cardigan! 


Monday, February 6, 2012

PJ Shorts From Sheets


I bought this cute sheet set at Goodwill for $5. I was planning on making the girls sleeping bags out of it, but that never happened. I decided to make them some pajama shorts for the summer. I found a pattern I already had that had both of their sizes in shorts.
I didn't want to cut the pattern because I needed a 3 and a 5. I also wanted to keep it intact so I could use it when they get bigger; the pattern goes up to a size 8. 
 So I used tissue paper to trace their patterns out. I just traced the sizes I needed and marked them with all the important instructions. I have enough material left over from the top sheet to make them a pair of pants too. Keep your mind open and you can find material in other places besides the fabric store. 

Tips:
- I used a pin to mark which pieces were the front of the shorts. 
- I used a piece of ribbon in the back as a tag so the girls know which way to put their shorts on. Also if you have two like pairs, you can use different color ribbon so they know which one is theirs. 


If you need a pattern for shorts check out Dana's blog. She has a tutorial for kid shorts, and also has a few links to other kid short patterns. 

Saturday, February 4, 2012

Lace Socks


If you love little girls in smocked dresses and lacy socks, you need to read this post! 
My girls wear smocked dresses and lacy socks to church a lot in the spring and summer. There is a kids consignment/boutique store where I usually buy their socks. They are a little under $4 and up. I think it's a little ridiculous for one pair of socks. So I thought I could try to make some. You can use a pair of white socks you already have and just buy lace trim. I found this lace trim at Hobby Lobby for less than $2 a yard. I bought half a yard and it's enough for two sets of socks at least. 
 The trim is basically bias tape with lace sewed to the bottom of it. 
 These socks from old navy are really long, they are rolled over twice. I only unrolled it one time, and then I pinned my trim to the end of it. It's really easy, just sandwich the sock between each side of the bias tape then pin it. 
 When I got to the end I left about an inch extra. I started sewing where the red pin is and just went around the sock. You can cut any excess off when you get to the end. Make sure the seam is on the inside of the sock or you might have to add a little something extra to the outside to hide the seam (oops, that's totally the reason why I added the bows!).


 When you are done flip the end seams over and sew together. 
 Ta-da! A lovely pair of lacy socks! 


Wednesday, February 1, 2012

Ashley Suzanne

 Check out this adorable outfit Ashley from AshleySuzanne made my little sweetie for her third Birthday. I love the matching bow! Ashley's super creative. She always has a great giveaway or review going on. Check her out!